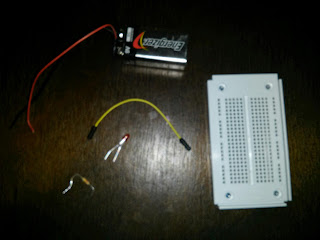
So you wanna light up some leds do ya.
Well in these post I will show ya how to get on your way to some electronic madness.
Difficulty: Newb
Time: 10 mins
Skill: 0
Parts list:
- LED or more
- 10k resistor
- Jumper wires
- Bread board
- 9volt battery with connector
First step gather all of your materials. Hopefully by now you have aquired the proper tools and parts.
Here's the breadboard mine came from the arduino kit I purchased from Amazon.
Some jumper wires. Always a good investment unless of course you make your own like I did with the help of www.we-online.com
As well as a power source I am using from and for a 9v battery.
Now that you have everything let's get started.
Like I said its simple. Place positive end of battery on one breadboard rail. The negative on the other rail. Place led.
Now with the jumpers atach one end to led and one end to the positive rail. Next a jumper from led to negative rail.
In this photo I used a resistor you can also if you have one.
Very simple to add another led same thing as long as the positve goes to positive rail and negative to the negative rail.


No comments:
Post a Comment